

The quality of your study notes often impacts your learning as well as overall academic performance. Well-written notes help you understand concepts easily and recall information quickly.
However, many students struggle with writing well-organized notes because of limited writing skills and a heavy academic workload. If you are one of those, then there is good news. Thanks to continuous advancements in technology, the process has become much easier.
On the internet, there are many AI-powered note-taking tools available that can help students create high-quality study notes easily. In this blog post, we will explain the process step by step with pictorial demonstrations.
Below, we have discussed a step-by-step procedure for writing good study notes by utilizing the power of AI.
Do not just immediately use AI to write notes. As a beginner, a better approach is to spend time reading and understanding your lectures, slides, and textbooks. Your goal shouldn’t be to memorize every detail but to get a good understanding of the topic for which you are planning to write study notes.
As you go through the study material, here is what you need to do:
This understanding will help you give better instructions to an AI-powered note-taker and get study notes that are closer to your requirements and expectations.
The next step is to explore the internet to find a reliable AI-powered note-taker. Luckily, there is a wide variety of such tools available. However, you need to be careful about one thing.
Many tools use AI to summarize or extract information from sources such as PDFs and web links. However, you should choose a tool that can also create study notes based on your own instructions. For students who prefer recording lectures rather than typing prompts, an AI note taker like Krisp automatically transcribes speech and filters out background noise, giving you a clean text draft to refine and organize.
Also we found Online Notepad, which offers free access without sign-up and comes with a “Help me write” feature for personalized note creation.
Now, we are going to provide the following prompt to the tool.
The Prompt:
“Create study notes on the topic ‘Photosynthesis.’ Include a brief introduction, key concepts, important definitions, and the step-by-step process.”
The Result:
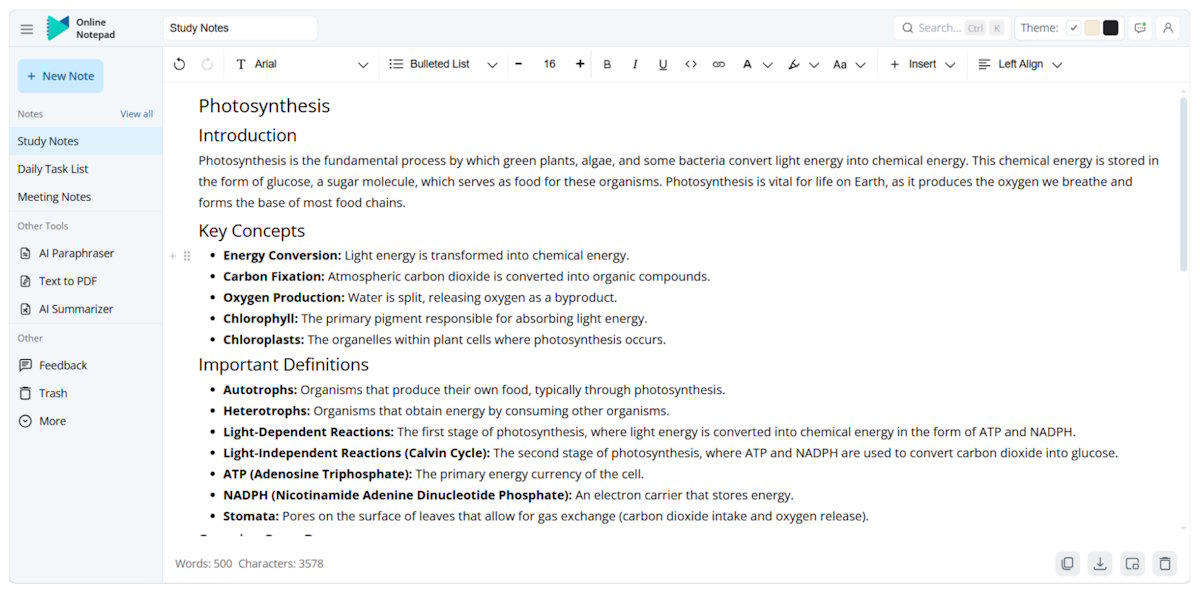
Responding to our input, the AI-powered note-taker generated a study note draft. This is how you can do it yourself. However, you should give it a look to make sure everything, including definitions, concepts, and other relevant details, is accurate.
It is always better to refine and personalize the study notes draft. You have the full control to manually edit the AI-generated draft in any way, such as:
However, if you find the refining or personalization process challenging, then there is no need to worry. Many AI-powered note-taking tools help students edit their notes in just a few clicks.
The tool we are using in this blog allows users to select the sentences that need to be refined. After selection, a “Refine Selection” button will appear. Upon clicking the button, it will display the following options:
A screenshot is attached below as a reference to this information.
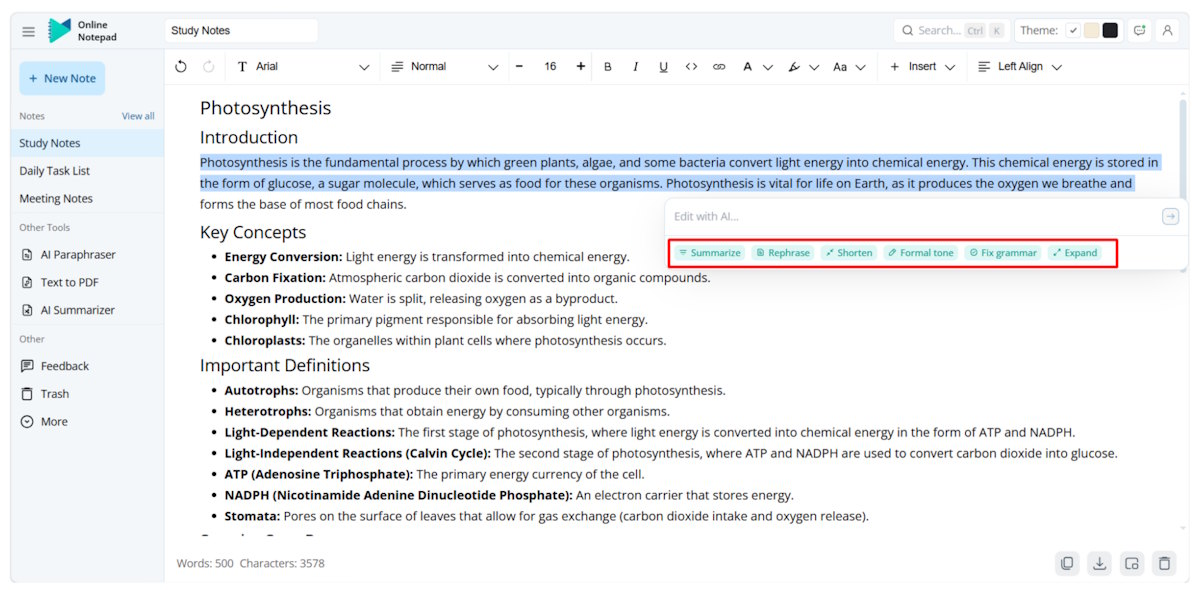
Refining and personalizing study notes can make them more meaningful and easier to review during revision.
Finally, once your study notes are ready, it is now time to organize them for better clarity.
You can use the formatting options offered by the AI note-taker to add headings, change font style and size, bold, italic, and underline specific words, adjust text alignment, insert bullet points or numbered lists, and much more.
After formatting, this is how the final draft looks:
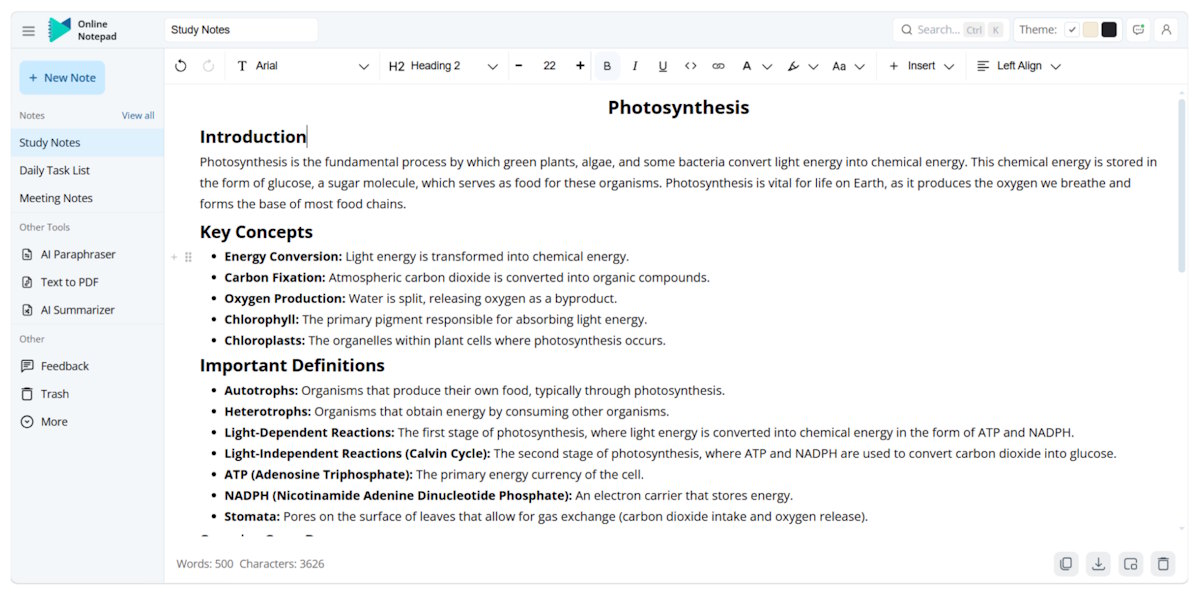
Good organization of study notes will make them visually appealing, easy to navigate, and easy to understand.
For students, creating well-written study notes is no longer a hectic and time-consuming task, all thanks to artificial intelligence (AI). They can now use specialized AI-powered note-taking tools to generate notes by providing personalized instructions. However, if you are a beginner, then it is essential to follow the right approach.
First, understand the study material whose notes you want to create, provide clear instructions to AI, refine and personalize the generated draft, and organize the final version for better clarity. In this beginner’s guide, we have explained this entire process in detail along with screenshots.